AUTOCAD

AUTOCAD相關大全 (AUTOCAD IN THIS BLOGGER)

必備功能         1.Autocad--工具列不見了,指令找不到,菜單欄消失,都找不到按的地方                             (Missing Menus and ToolBars) 基本功能     設定     ...

搜尋此網誌

顯示具有 [SOFTWARE][Autocad]Trouble Shooting 標籤的文章。 顯示所有文章

2020/7/1

Autocad--選取問題,無法自動增加選取的物件到選集(Can not add object to selection by default)

選取物件要透過Shift鍵才能再增加或減少選取物件,可以透過改變設定成自己習慣的方式.。

The selected objects can only be increased or decreased by the Shift key. You can changed the setting to your own habits.
在指令列 OP -> ENTER

單擊滑鼠 左鍵

單擊滑鼠 左鍵
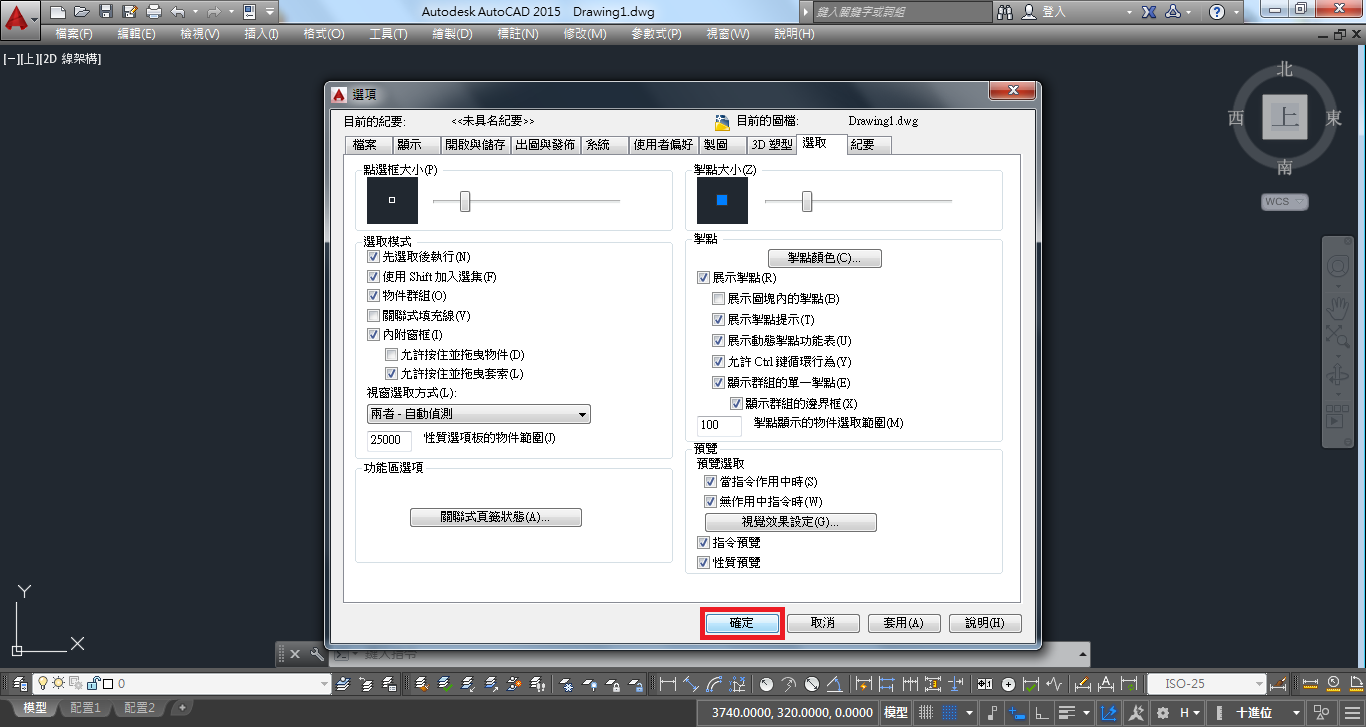
單擊滑鼠 左鍵
完成!!

先選物件後,要再增加物件

SHIFT + 單擊滑鼠 左鍵 

2020/6/1

Autocad-無法標記中心標記*無效*(Can not mark center mark)


 在指令列 DIMCEN -> ENTER


不要設零就可以了    
(NO ZERO)
完成!!

測試
Test
在指令列 DIMCEN -> ENTER

單擊滑鼠 左鍵

    
可以

2020/2/24

Autocad--繪製順序,圖或文字被蓋到,遮到不該遮的東西(Draworder,something cover to other thing)

想像在拍照時,有人擋到你時,請他往後站就不會遮到,就跟繪圖時文字尺寸標註被蓋住,或照片遮到圖等,只要移動排順序即可。

While taking a photo someone is in your way and let that one stand behind to you would be fine. So there is something cover to your text, dimension, picture and so on, just organize the draworder.


選擇要改變前後的物件 -> 單擊滑鼠 右鍵

1. -> 2. -> 單擊滑鼠 左鍵


完成!!

另提供二種可以改變順序的方法
 
單擊滑鼠 左鍵

單擊滑鼠 左鍵
選擇要選的指令即完成!!


在指令列 DRAWORDER -> ENTER

選擇要改變前後的物件 -> ENTER

選擇要選的指令 單擊滑鼠 左鍵

完成!!

2019/12/7

Autocad--無法填充物件解決方法(Can't hatch or fill the area or the object )

Can you fill the cup which was holed? That's the reason you can not fill or hatch the object because the object is not closed. So let's repair the area.

試想一個有破泂的杯子何時可以裝滿它? 無法填充物件的原因只有一個,那就是該物件不是封閉的,所以把該物件修補變成一個封閉的就可以了

錯誤訊息彈出

紅色圈圈即表示有開洞

選取端點 ->  單擊滑鼠 左鍵

點選另一個端點 ->  單擊滑鼠 左鍵
讓二個點重合
完成!!

選不到端點,就把端點打開吧!
紅色方框處 ->  單擊滑鼠 左鍵

紅色方框處 ->  單擊滑鼠 左鍵

確認端點有打勾
完成!!

2019/9/30

Autocad--清爽螢幕,將繪圖區畫面放到最大,隱藏繪圖工具都不見了(Clean Screen)

Full Screen, hide Toolbars and maximize screen.

全螢幕, 隱藏所有工具列, 最大化畫面.想讓繪圖畫面變成下方..


CTRL+0

完成!!

CTRL+0 (可參考下面)


2019/7/14

Autocad--線粗出圖時與設定或畫面上不一樣,印不出線條粗細問題(Print Lineweight problem)

印不出來,就是設定問題!

You can't print what you want, just something about "setting".

假設如上圖所示,它是有不一樣的線條粗細

選擇要列印

預覽中的出圖,線粗變成一樣

出圖物件線粗 單擊 滑鼠左鍵 

再次預覽出圖
完成!


2019/6/23

Autocad--線粗設定完畢後,畫面上的線粗都沒有改變,看不出線粗(Display Lineweight)

設定完線粗發現螢幕上根本沒有任何變化,因為預設的顯示線粗是關閉的,那就打開它吧!

Set the line weight and then there is nothing changed on screen. Because the Default setting on display line weight is closed. Let's open it up!


在紅色框處 單擊滑鼠 左鍵

線粗 -> 單擊滑鼠 左鍵

此時 紅色框線處就會出現了
單擊滑鼠 左鍵

完成!

或是另一種改變設定的方式是
在指令列 LWDISPLAY -> ENTER

1 -> ENTER
(關閉當然是按下 0 )

完成!


2018/11/15

Autocad--文字不想要鏡射或文字鏡射的設定(Mirrtext)

MIRRTEXT

0 維持文字方向
1 鏡射文字

0 Retains text direction
1 Mirrors the text
預設值是0 無法鏡射文字的,所以直接下鏡射指令吧~
The default setting is 0. It doesn't mirror the text, so let's try it~

在指令列輸入 MI -> Enter

在紅色點的地方 單擊滑鼠左鍵

在紅色點的地方 單擊滑鼠左鍵

 Enter

在紅色點的地方 單擊滑鼠左鍵

在紅色點的地方 單擊滑鼠左鍵

Enter

看到了嗎?文字被鏡射後沒有變化
完成!!

在指令列輸入 Mirrtext -> Enter

1 -> Enter

重複剛才的動作 選取要鏡射的文字

1. 單擊滑鼠左鍵
2. 單擊滑鼠左鍵

文字原本是反的,鏡射後變成正的
完成!!